What is a whiteboard animation?
A whiteboard animation is a video in which line drawings are sketched on a plain background, scene by scene, while a narrator explains what is being drawn. The drawing appears at the pace of the voice, so the viewer's eyes and ears get the same idea at the same time. That is why the format is popular for training, lessons and product explainers: it suits ideas that are easier to show than to read.
What do you need before you start?
You need a clear goal, a rough length and your source material. Everything else (the drawings, the voice, the timing) follows from those three. Before opening any tool, write down:
- Who is watching: new starters, managers, customers, Year 9 students.
- What they should know or do afterwards: one sentence, such as "report a near miss within the shift".
- How long it should be: 1–3 minutes covers most training and explainer topics. See how long a training video should be.
- Where it will be watched: a course platform, YouTube, a team chat or a phone feed. This decides the shape (wide, tall or square).
- The source: a policy PDF, slide deck, lesson plan or just your own notes.
Step 1: Who is the video for, and what should they do next?
Start with the viewer and the single action you want from them. A video that tries to cover a whole 20-page policy will lose people; one that explains a single behaviour ("how to report a phishing email") will stick. Three messages? Plan three short videos.
Step 2: How do you write a whiteboard animation script?
Write the narration first, in short spoken sentences, then check the word count against your target length. A comfortable voice-over pace is around 130–150 words per minute, so a script that is too long will either feel rushed or run over time. Read it out loud with a timer before you draw anything.
| Video length | Words of narration (at 130–150 wpm) | Typical scenes |
|---|---|---|
| 30 seconds | 65–75 | 3–4 |
| 1 minute | 130–150 | 5–7 |
| 2 minutes | 260–300 | 8–12 |
| 3 minutes | 390–450 | 12–16 |
| 5 minutes | 650–750 | 18–25 |
A simple structure works for almost every topic: a hook, the problem, the explanation, an example, a recap and one clear next step. Our guide on how to write an explainer video script goes through each part with a full 2-minute example.
Step 3: How do you storyboard it?
Split the script into scenes, one idea per scene, and write a plain description of what should be drawn next to each line. You don't need to sketch anything yet. A two-column table is enough: "what's said" on the left, "what's drawn" on the right.
- One idea per scene. If a line has two "and"s in it, it is probably two scenes.
- Draw the noun, label the point. Narration says "a near miss is anything that could have hurt someone"; the drawing shows a slipping pallet with the label "near miss".
- Use numbers and short labels, not sentences. Viewers can't read a paragraph while listening.
- Plan a closing scene that sums up the action, such as a tick and "Saw it? Report it."
Step 4: Which drawing style should you use?
Pick the style that matches the tone of the topic and where it will be shown. Black marker on white is the safest choice for corporate training because it is clean and easy to read on any screen. A chalkboard feels like a classroom, a notebook feels informal and personal, a blueprint grid suits technical or engineering topics, and pencil on warm paper feels softer and more reflective.
Whatever the style, keep drawings to outlines plus a few details. Simple line art reads well at small sizes and lets the narrator do the explaining. If your organisation has brand colours, use one or two as accents (an arrow, a highlight) rather than colouring everything.
Step 5: Should you record your own voice or use an AI voice?
Use whichever voice your audience will trust and you can produce consistently. Recording yourself is free and personal, but needs a quiet room, a decent microphone and several takes. A professional or AI narrator gives a steady read every time and makes updates easy: you change the text rather than re-record. For compliance topics, calm and clear usually beats energetic.
Step 6: How do you get the pacing right?
Match each drawing to the length of its line of narration, and give the viewer a beat to look at the finished picture before the next scene. As a rule of thumb, most scenes in a training video work at 5–15 seconds. If a scene runs much longer, split it; if several scenes flash past in two seconds each, merge them.
- Start drawing the main object as the narrator names it, not before.
- Let labels appear after the object they describe.
- Leave a short pause after a key number or rule.
- Avoid speeding up the voice to fit; cut words instead.
Step 7: Do whiteboard videos need captions?
Yes. Captions help viewers who are deaf or hard of hearing, people watching on mute in an open office or on a phone, and anyone watching in a second language. Export a subtitle file as well as burnt-in captions where you can: .srt files work with YouTube and most video editors, and .vtt files work with web players.
Step 8: Which format should you export?
Export an MP4 for almost everything, in the shape that fits the platform: wide 16:9 for courses, slides and YouTube; tall 9:16 for Shorts, Reels and TikTok; square 1:1 for LinkedIn and feeds. If the video is going into a learning management system and you need completion tracking, export a SCORM package instead. Our explainer on what SCORM is covers how that works.
How do you make a whiteboard animation by hand?
Making one by hand means building every scene yourself in a whiteboard tool such as VideoScribe. VideoScribe offers a library of drawn images, scenes on a timeline with pan and zoom, a choice of drawing hands, AI voices or your own recording, music, and export in widescreen, square or vertical formats. It also now has AI help for scripts and images. The typical workflow looks like this:
- Write and time your script outside the tool.
- Record or generate the voice-over and import it.
- Add images from the library (or your own) for each scene.
- Set the draw time, pause and camera move for each element on the timeline.
- Add text labels, then sync each element to the voice-over.
- Add music if you want it, preview, and fix timing.
- Export the video and add captions in a separate step if needed.
The manual route gives you the most control over exactly which image appears, where the camera moves and how long each element takes to draw. The trade-off is time: every element is placed and timed by hand, and changing the script later can mean re-syncing many scenes.
How do you make a whiteboard animation with AI?
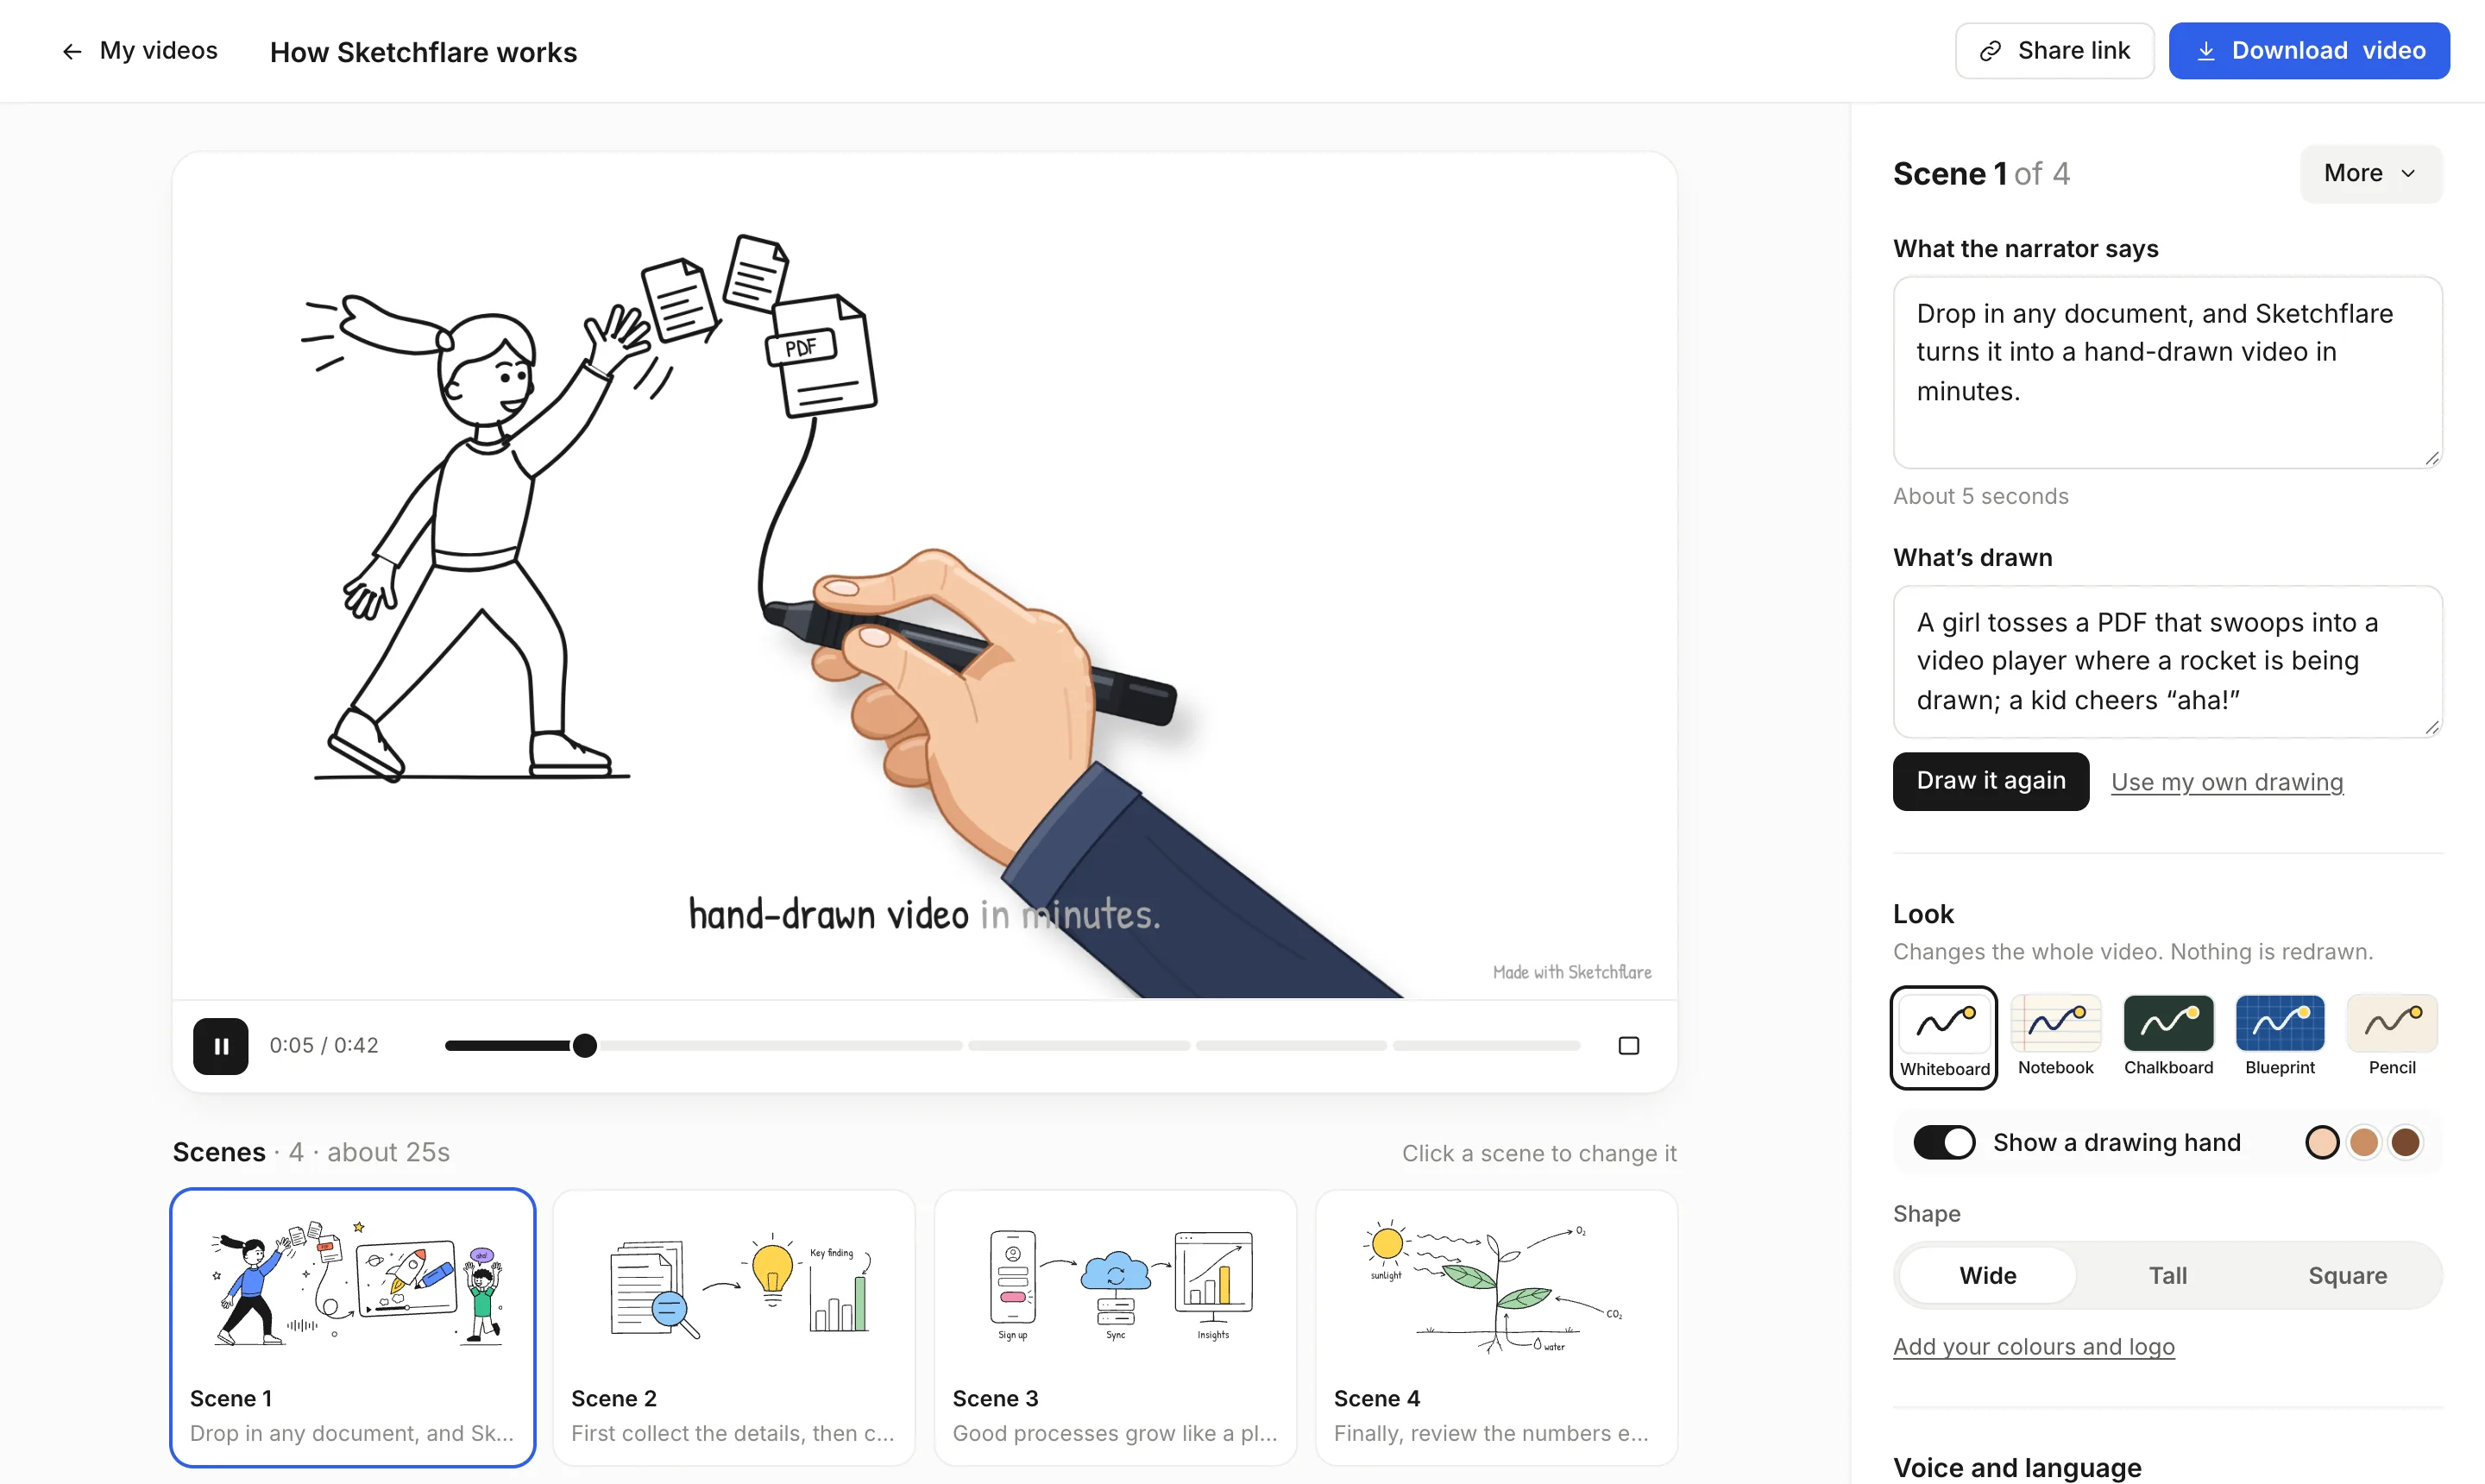
With an AI tool, you describe the topic or upload the source and the tool produces the script, drawings and voice-over together, which you then edit. In Sketchflare, it works like this:
- Start: type a topic, upload a document (PDF, TXT or Markdown), or choose "Paste my script" to keep every word you wrote.
- Choose the options: Look (Whiteboard, Notebook, Chalkboard, Blueprint or Pencil), Voice (six narrators, or no voice with captions only), Length (about 30 seconds up to 10 minutes), Shape (wide, tall or square) and Language (16 languages).
- Press "Make my video": the script is split into scenes, every scene is drawn as line art (outlines first, then details, then labels), the voice-over is recorded in one take, and word-by-word captions are added. A typical 1–3 minute video takes a few minutes.
- Edit in the studio: for any scene, change "What the narrator says", or change "What's drawn" and press "Draw it again". You can also upload your own SVG with "Use my own drawing", add, move or delete scenes, and switch the look, hand, shape or voice for the whole video.
- Check the facts: read every scene against your source before sharing.
- Download or share: MP4, .srt and .vtt subtitles, a SCORM 1.2 package on Pro and Team, or a share link that viewers can open without an account.
Manual or AI: which should you choose?
| By hand (e.g. VideoScribe) | With AI (e.g. Sketchflare) | |
|---|---|---|
| Who writes the script | You | AI drafts it, or you paste your own |
| Who places the drawings | You, element by element | AI draws each scene; you redraw or upload any you want to change |
| Control over timing and camera | Full, on a timeline | Per scene, driven by the narration; no timeline editor |
| Changing the script later | Re-sync affected scenes by hand | Edit the narration or drawing note and redraw that scene |
| Best for | Bespoke brand pieces, designers who want every detail | Training teams, teachers and creators who need many videos quickly |
For a fuller look at the tools, see our roundup of the best whiteboard animation software and the Sketchflare vs VideoScribe comparison.
Worked example: a 1-minute safety refresher
Here is a short whiteboard script for a warehouse team, written with the structure above: a hook from a real-feeling incident, a definition, why it matters, how to act, a reassurance and a clear close. It runs to about 120 words, a little under a minute of narration.
Scene 1. Says Last Tuesday, a pallet slipped off a forklift in aisle 4. Nobody was hurt. That's exactly why we need to talk about it.
Drawn A forklift in a warehouse aisle with a pallet tipping off its forks. A small hanging sign reads "Aisle 4".
Scene 2. Says A near miss is anything that could have hurt someone, but didn't. A slip, a falling box, a blocked fire exit.
Drawn Three small pictures in a row: a wet-floor sign labelled "slip", a box falling from a shelf labelled "falling object", a fire exit door with boxes in front labelled "blocked exit".
Scene 3. Says Near misses are warnings. The same cause, on a worse day, becomes an injury.
Drawn Two identical forklift scenes side by side. The left is labelled "Today: near miss", the right "Next time?" with a warning triangle.
Scene 4. Says Reporting one takes two minutes. Use the near-miss form on the intranet, or tell your shift lead.
Drawn A phone showing a short form with three fields labelled "Where", "What happened" and "Photo". Beside it, a worker talking to a supervisor holding a clipboard.
Scene 5. Says You don't have to name anyone. We're looking for causes, not people to blame.
Drawn A magnifying glass over a loose pallet strap, labelled "cause". Next to it, a pointing finger crossed out, labelled "blame".
Scene 6. Says The safety team reviews every report, and we'll share what we changed on the noticeboard.
Drawn A noticeboard with a pinned note: "You reported: loose strap. We changed: daily strap checks."
Scene 7. Says So if something nearly goes wrong, report it. Two minutes now could save someone's week.
Drawn A large tick inside a circle, with the words "Saw it? Report it." underneath.
Each "what's drawn" note names concrete objects and short labels, never full sentences. That keeps the drawings readable, whether you build them by hand or let AI draw them.
What are the most common whiteboard animation mistakes?
- Too many words on screen. Labels, not paragraphs.
- A script written for reading, not speaking. Long sentences and jargon sound stiff out loud.
- Cramming. More than one idea per scene, or a 3-minute script squeezed into 1 minute.
- Drawings that don't match the words. If the narrator says "three steps", show three numbered steps.
- Skipping the fact check. Read every scene against the source, especially numbers, dates and names.
Questions
How long does it take to make a whiteboard animation?
By hand, it depends on the number of scenes and elements, because each one is placed and timed individually. With an AI tool like Sketchflare, a typical 1–3 minute video is drafted in a few minutes, then you spend time reviewing and editing.
Can I make a whiteboard animation for free?
Yes. Several tools have free plans or trials. Sketchflare's Free plan includes 3 video minutes a month and 30 AI drawings, with 720p downloads and a small "Made with Sketchflare" mark, and no credit card is needed.
How many words is a 2-minute whiteboard video script?
Roughly 260–300 words, based on a comfortable voice-over pace of 130–150 words per minute. Read it aloud with a timer to check.
Do I need to be able to draw?
No. Manual tools give you a library of ready-made images, and AI tools draw each scene from a plain description. You only need to describe clearly what each scene should show.
Can I use my own script?
Yes. In Sketchflare, choose "Paste my script" and every word you wrote is kept as the narration; the AI only splits it into scenes and draws them.